If you’re a Hostinger user looking to access your email, you’ll need to log in to your account first. Hostinger provides a simple and easy way to do this, so you can start sending and receiving emails in no time.
In this tutorial, we’ll guide you through the process of Hostinger email login step by step. Whether you’re using it for personal or business purposes, accessing your Hostinger email is essential for staying connected.

hostinger email login
Hostinger Email Login
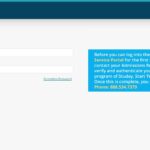
First, go to the Hostinger website and locate the login button. Enter your email address and password in the designated fields. Make sure to double-check your credentials to avoid any login issues.
Once you’ve entered your login information, click on the “Login” button. You will then be directed to your Hostinger email inbox, where you can start composing, sending, and receiving emails.
If you encounter any issues during the login process, you can refer to Hostinger’s official support page for troubleshooting tips and solutions. They have a detailed guide on common login problems and how to resolve them.
Now that you’ve successfully logged in to your Hostinger email account, you can start using it to communicate with others efficiently. Whether it’s for personal or professional use, Hostinger email provides a reliable platform for all your email needs.
With these simple steps, you can easily access your Hostinger email account and start using it to its full potential. Stay connected and organized with Hostinger’s user-friendly email service.